How to Verify Authentic Electronic Components Before You Buy
How to verify authentic electronic components: visual, electrical, X-ray and decapsulation inspection, plus certificate and traceability supply checks.
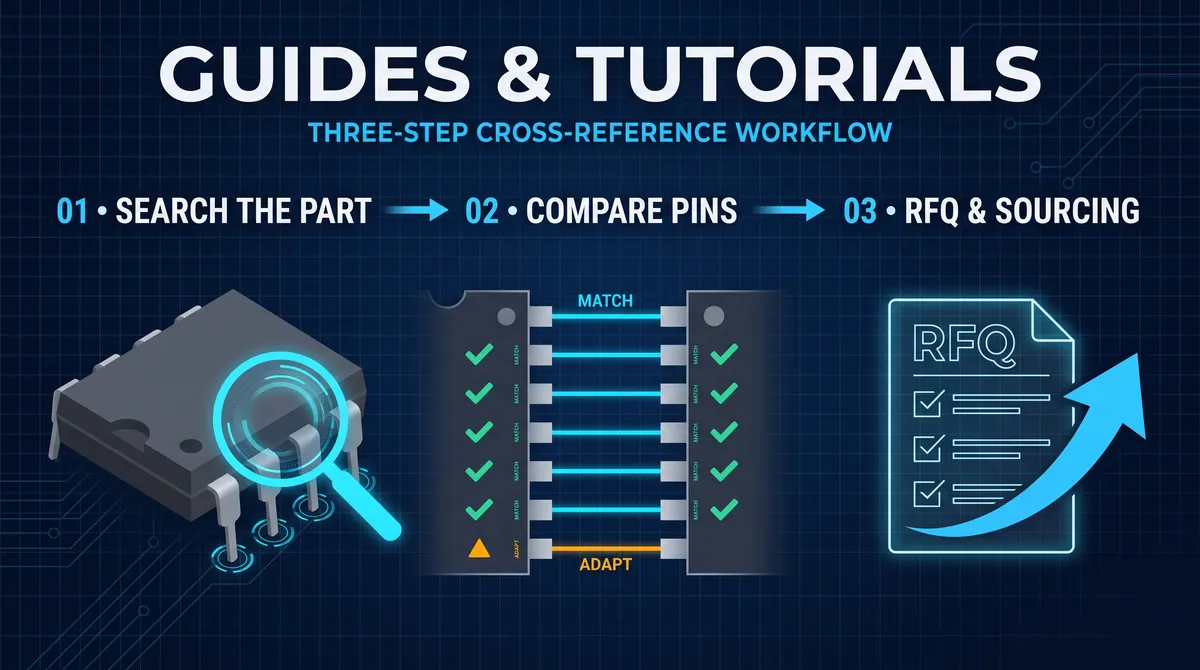
How to verify authentic electronic components is a question that has moved from the procurement niche to the mainstream in the last decade, because the global component shortage and the long electronics supply chain have made counterfeits a real, growing risk for every buyer. An authentic electronic component is a part produced by the original component manufacturer, or a qualified authorized or independent source, that is exactly what its markings and documentation claim: the right silicon, the right package, the right die, the right date code, and the right performance. A counterfeit is anything else presented as that part, whether it is a recycled part stripped from a used board and refinished to look new, a remarked part whose markings were erased and reprinted to a more valuable number, a blacktopped part whose original surface was ground off and re-coated, or a cloned part with an imitation die. The stakes are high because a counterfeit part does not simply fail, it fails at the worst moment, in a power supply, a controller, a safety system, or a production line, and it corrupts the test results of the board around it. This guide lays out the full verification toolkit, from the visual inspection that catches most counterfeits in minutes to the X-ray and decapsulation that prove authenticity beyond doubt, and it frames the supply chain checks that decide whether a part was ever worth trusting in the first place.
The verification discipline that serious buyers and independent distributors use is a ladder of increasing cost and increasing certainty. At the bottom is visual inspection, the cheapest and fastest test, which catches the majority of counterfeits through markings, packaging, leads, and body condition. Above it is electrical testing, which exercises the part functionally and parametrically against its datasheet and shows up parts whose silicon is not what the markings claim. Above that is physical analysis, X-ray of the internal die and bond wires, and decapsulation for a direct look at the silicon, which are the definitive tests when a critical part is going into a safety product or when the stakes justify the cost. Alongside all of these runs the supply chain verification, the certificates, the traceability, and the audit of the source, because the most effective anti-counterfeit measure is never buying from a source that cannot prove where the part came from. This guide walks the whole ladder in order, so that a buyer can start at the level appropriate to the risk and climb when the evidence demands it.
How to Verify Authentic Electronic Components: What You Are Looking For
The verification of an authentic electronic component is a comparison, and the standard for the comparison is the part that the original component manufacturer produces and documents. When you verify a part you are asking whether every physical and electrical attribute matches that standard, and the four attributes that matter are the identity, the packaging, the silicon, and the behavior. Identity means the markings, the part number, the date code, the logo, and the country of origin printed on the body, and counterfeiters fail here first because printing is the easiest thing to fake badly. Packaging means the original manufacturer's tape, reel, tube, tray, or box, the labels, the moisture barrier bag, and the humidity indicator, and authentic parts arrive in packaging that carries the manufacturer's artwork and batch records. Silicon means the actual die inside the package, its size, its bond wire pattern, its process, and its markings, which only X-ray and decapsulation reveal and which are nearly impossible to fake convincingly. Behavior means the electrical performance the datasheet promises, the supply current, the timing, the output swing, the temperature behavior, and the part's identity itself, which functional testing measures directly. A part that passes all four at the depth appropriate to its risk is authentic, and a part that fails any one is a counterfeit until proven otherwise.
The reason so many counterfeit tests are visual is that the counterfeit production process leaves traces that authentic production does not. A recycled part carries the evidence of its former life, solder residue on the leads, edge damage from removal, a date code older than the label claims, or a body that was refinished to hide wear. A remarked part carries the evidence of reprinting, a logo or number with the wrong font, a marking area that was abraded before printing, or a date code that conflicts with the lot numbers around it. A blacktopped part carries the evidence of re-coating, a surface texture that does not match the manufacturer's epoxy, edge roughness where the new coat meets the old, and markings that sit proud of the surface instead of being molded or printed into it. Even a cloned part with an imitation die usually gives itself away in behavior, a supply current that does not match the datasheet, an output that is weak at temperature, or a timing characteristic that drifts outside the specification. The verification toolkit exists to find these traces, and the sections that follow describe each tool in the order a practical review would use it.
The Main Types of Counterfeit Electronic Components
Knowing the counterfeit types is the foundation of verification, because each type leaves a different signature and calls for a different test. The most common type is the recycled part, a used component pulled from a discarded board and cleaned, refinished, and sold as new; its signature is solder residue on the leads, a worn body, and an inconsistent date code, and it fails electrically at a low rate because the silicon is real but old and heat-stressed. The second type is the remarked part, a genuine part of a less valuable grade or number whose markings were removed and replaced with those of a more expensive or scarce part; its signature is printing anomalies, an abraded marking area, and a part that electrically matches the cheaper device under the new number. The third type is the blacktopped part, a step beyond remarking where the original surface is ground off and a new black coating is applied before remarking, hiding both the original markings and the surface damage; its signature is the new coating itself, its texture, its thickness, and its edge boundary. The fourth type is the cloned or counterfeited part, an imitation silicon die built to mimic the original; its signature is a different die under X-ray and different electrical behavior under test. The fifth category, factory overruns and grey market parts, is not counterfeit in the criminal sense but still demands verification because its provenance and its conformance are not guaranteed.
Each type has a natural test hierarchy. Recycled parts respond to the visual check for solder and wear, and to electrical testing that stresses the part at temperature to expose aging. Remarked parts respond to careful marking examination, since the reprinted number rarely matches the manufacturer's font, and to electrical testing that identifies which device the silicon actually is. Blacktopped parts respond to surface inspection with magnification and to X-ray, because the extra coating thickness and the removed top surface are visible in the package. Cloned parts respond to X-ray and decapsulation, which show a die that does not match the authentic layout, and to full electrical characterization. A practical program therefore does not ask whether the part is a recycled, remarked, blacktopped, or cloned counterfeit, it runs the ladder from visual to electrical to physical and lets the evidence assign the type. The counterfeiter's entire business model depends on the buyer stopping early, at the price quote, and the verification program's entire value is refusing to stop until the part matches the manufacturer's standard.
How to check the markings on an electronic component
Marking inspection is the first line of defense and the fastest to learn, and it works because printing is where counterfeiters most often cut corners. Examine the part under magnification with a bright light, and compare the font, the size, the spacing, and the style of the part number, the logo, the date code, and the country of origin against a known authentic sample or the manufacturer's published marking diagram. Look for a marking area that appears abraded, polished, or sanded, which indicates remarking, and for a body that is unusually smooth or glossy, which may indicate a blacktopped surface. Check the date code for internal consistency, a recent-looking date code on a package with old-style artwork or a date code that conflicts with the lot numbers of the surrounding reels is a warning sign. Check whether the printing is laser-marked, ink-marked, or molded, and whether it matches the manufacturer's standard process, and verify that the marking withstands the manufacturer's intended cleaning method rather than smearing or lifting. A single anomaly in the markings does not prove a counterfeit by itself, but it is the trigger to climb the ladder to electrical and physical verification, and it is the first fact recorded in the inspection report that protects the whole review.
Visual Inspection of the Package, Leads, and Packaging for Authentic Components
The package inspection extends the marking check to the physical condition of the component, and it catches the recycled part that remarking does not. Examine the leads for the signs of a previous life: solder residue, uneven plating, bent or damaged tips, scorching, or a lead finish that differs from one lead to the next, since a recycled part carries the residue of its reflow and removal. Examine the body for mold lines, flash, edge chips, and a consistent surface texture, since a refinished body shows sanding marks, a re-coated body shows a coating boundary, and a new part shows the manufacturer's clean, uniform molding. Examine the package underside and the four sides with magnification, because counterfeiters polish visible faces and forget the edges and the underside where the original surface remains. Check the leads' coplanarity and the package dimensions against the datasheet drawing, since an imitation package rarely holds the exact body width and lead pitch of the original. For a surface-mount part, look at the solder plating composition, because an authentic part has the manufacturer's plating and a recycled part shows the residue or the re-plating of the removal process. Every finding is recorded with a photograph, because the photograph is what the next reviewer and the next audit need.
The packaging inspection covers the material the part arrives in, and it is the fastest screen of all. Authentic components arrive in the manufacturer's original tape and reel, tube, tray, or box, with the manufacturer's artwork, the lot number, the quantity, and a label that matches the reel or box content. Examine the tape for the manufacturer's printing and the reels for the label's lot code, and confirm that the label, the tape, the parts, and the datasheet all agree on the part number and the date code. Check the moisture barrier bag for the humidity indicator card and the moisture sensitivity label, because a genuine lot ships with both and a counterfeit repack often reuses or omits them. Check for the signs of re-reeling, a reel with a newer label over an older one, tape with a print pattern that does not match the reel, or a quantity that does not match the label. The packaging inspection is not a proof of authenticity by itself, since counterfeiters copy packaging too, but it is the first cross-check that tells the buyer whether the part's stated provenance is consistent. A lot that is internally inconsistent in its packaging is a lot to treat as suspect until the electrical and physical checks resolve it.
Electrical Verification: Testing an Electronic Component Against Its Datasheet
Electrical verification answers the question that visual inspection cannot: whether the silicon behaves like the authentic part. The test is run against the datasheet, which states the supply range, the quiescent or operating current, the output voltage and current, the timing, the frequency, the input and output levels, and the absolute maximum ratings that the authentic part must meet. The functional test drives the part in a circuit that exercises its main function, a regulator delivering its rated output, an op-amp amplifying within its bandwidth, a timer generating its frequency, a logic gate or register driving its outputs, and compares the behavior to the datasheet values and to a known good sample of the authentic part. The parametric test measures the specific values the datasheet quotes, the supply current at idle, the output voltage under load, the propagation delay, the rise and fall time, the input offset and bias current, and checks each against the datasheet's min and max over the operating temperature range. The most revealing measurements for counterfeit detection are the ones the counterfeiter cannot guess, the supply current at idle, the exact timing, and the behavior at temperature extremes, because an imitation die rarely matches all of them. A part that passes functional and parametric testing at the normal operating points and at the temperature extremes is electrically authentic even before the physical analysis.
The electrical test plan scales with the risk and the volume of the purchase. For a low-risk order from a known source, a functional test on a sample lot, say five percent of the quantity, is a reasonable screen. For a medium-risk order, add the parametric measurements and test across the operating temperature range on a larger sample. For a high-risk order, a critical part for a safety product or a scarce part from an unknown broker, test a statistically meaningful sample with the full parametric set, run the parts at their absolute maximum conditions, and take the failures straight to physical analysis. The test equipment does not need to be exotic, a benchtop supply, a digital multimeter, an oscilloscope, and the product's own test fixture cover most functional verification, while a curve tracer adds the IV characterization that distinguishes a genuine die from an imitation. The electrical results go into the same report as the visual findings, because a part that looks new but behaves wrong is evidence of a clone, and a part that looks worn but behaves right is evidence of a recycled original, and the two different types demand different responses from the buyer.
How to verify a part with an IV curve and a curve tracer
The current-voltage curve is one of the strongest electrical proofs of identity, because the curve of a genuine die is a fingerprint of its process and layout. A curve tracer sweeps the voltage across a pin and records the resulting current, producing the characteristic curve family that the datasheet's figures and the authentic sample's curves confirm. Compare the candidate's curve family to the authentic sample's: the knee voltages, the saturation currents, the breakdown points, and the temperature behavior of the curves should match within the datasheet's tolerances. An imitation die, a remark from a different device, or a degraded recycled part shows a curve that deviates at some point, a lower breakdown, a higher leakage, a different saturation current, and the deviation is the evidence. For parts with a well-known function, the diode curves on the protection and ESD structures of the I/O pins are also consistent across authentic lots and a fast screen for a cloned die. The curve tracer is fast, cheap, nondestructive, and it earns its place in every verification bench, and a curve comparison is recorded in the report beside the functional test, giving the buyer a second independent line of evidence that the silicon is the silicon it claims to be.
X-Ray and Decapsulation: Proving an Electronic Component Is Authentic Inside
The definitive proof of authenticity is the internal inspection, because the die and the bond wires inside the package are the hardest things to fake convincingly. X-ray inspection images the internal structure without destroying the part, revealing the die's size and position, the bond wire count, pattern, and material, the die attach, and the cavity, and it compares these to the authentic part's known internal layout. An imitation die is smaller or larger than the original, a cloned part has a different wire pattern, a blacktopped part shows the extra coating thickness on the die and the top of the package, and a recycled part can show heat damage or rework in the wire bonds. X-ray is fast, nondestructive, and definitive for the parts where the authentic internal layout is known, and it is the test that most commercial counterfeits cannot survive, because reproducing the exact die and wire pattern is beyond the counterfeit production line. The X-ray images become part of the verification record, and the comparison against the authentic sample is documented with the measurements labeled on the image.
Decapsulation goes one step deeper, removing the package cap with acid to expose the die itself for direct examination under a microscope. The decapsulated die shows the manufacturer's process, the die markings, the bond pad layout, the die size, and the circuit structure, and a comparison against the authentic die confirms identity beyond any doubt. Decapsulation is destructive, so it is reserved for the highest-stakes decisions, the critical parts going into safety systems, the expensive parts where a single counterfeit is costly, and the disputed lots where visual, electrical, and X-ray evidence is not conclusive. The procedure is a laboratory skill, using the correct acid, temperature, and exposure time for the package material, and it is normally performed by a test house rather than by the buyer. The combination of X-ray and decapsulation is the gold standard of electronic component verification, and while it is rarely needed for every line of a BOM, the parts that justify it are exactly the parts where a counterfeit would be most dangerous, and the definitive answer is worth the cost of the test.
When physical inspection is required for a component lot
Physical inspection is not needed for every order, and the judgment of when to climb that far is a risk decision. Use X-ray for any part where a counterfeit would be dangerous or expensive, a safety component, a high-value IC, a scarce or end-of-life part from an unknown source, and use it on a sample from each lot rather than on a single unit. Use decapsulation when the X-ray is inconclusive, when the lot is disputed, or when a critical application demands certainty beyond X-ray, and run it on a small number of samples whose destruction is budgeted into the verification cost. The decision rules are the same rules that the aerospace and defense industries codify in their counterfeit avoidance standards, which require the level of inspection to scale with the risk of the part and the confidence in the source. A buyer who always runs visual and electrical testing and selectively runs X-ray and decapsulation on the risky lots achieves the protection of a full program at a fraction of its cost. The record of which level was applied, and why, is what makes the program defensible, because a verification program is judged as much on the consistency of its decisions as on the number of tests it runs.
Supply Chain Verification: Certificates, Traceability, and the Source Audit
The most effective verification happens before the part is ever received, in the qualification of the source, because a part from a vetted source rarely needs the full ladder, while a part from an unknown broker always does. The supply chain verification starts with the source's identity and history: an authorized distributor with a direct franchise, an independent distributor with a test laboratory and a documented quality system, or a broker with a desk and a telephone, and the three carry very different levels of inherent risk. The documents that follow are the certificate of conformance, which states that the part meets the specification and the authenticity claim, the lot traceability, which ties the part back to its manufacturer, its lot, and its date code, the test reports, which show the inspection the source itself performed, and the supplier audit, which verifies that the source's processes actually match its claims. Each document is only as strong as the party behind it, so the qualification weighs the source's reputation, its references, its facilities, and its willingness to answer engineering questions rather than only to quote a price.
The buyer's supply chain verification also includes the ordering discipline that keeps counterfeits out of the door. Buy from sources that can show the documents, request samples before volume for an unknown source, and verify those samples with the inspection ladder before the quantity order ships. Confirm the part's packaging, the tape, reel, labels, and moisture barrier, matches the manufacturer's format, and reject any lot whose packaging is inconsistent. Keep the verification record with the purchase order, so that the same evidence protects a later dispute and a later audit. And for the parts that matter most, the end-of-life and scarce parts that counterfeiters most like to fake, treat the source as the primary control and the inspection as the confirmation, because the combination of a vetted source and a verified lot is what the counterfeit supply chain cannot reproduce. The supply chain is where the money flows, which is why the verification program spends so much of its energy there.
How to read a certificate of conformance for electronic components
The certificate of conformance is the most common document in the industry, and it is worth reading critically because its value depends entirely on what it actually certifies. A good certificate names the part number, the lot number, the quantity, the manufacturer, the date code, the packaging, and the test results, and it states specifically that the part meets the datasheet specification and that it is original manufacturer production. A weak certificate states that the part is "new and unused" or "guaranteed authentic" without naming the lot, the tests, or the source, and it certifies nothing that a counterfeit cannot also print. Read the certificate against the lot in hand: the part number on the certificate must match the part number on the label and the reel, the lot and date code must be consistent, and the quantity must match the shipment. Ask for the test reports that back the certificate, the visual inspection sheets, the electrical test data, or the X-ray images, and treat a certificate without supporting data as a statement rather than as evidence. The certificate is the source's claim, and the supporting reports are the proof, and a verification program that accepts the claim without the proof is trusting the party it is trying to guard against.
Worked Example: Verifying a Lot of Legacy Logic Parts
Verifying a lot of legacy logic parts is the worked example that shows the ladder on a real order, and it is the case the obsolete and the surplus channels produce daily. A batch of 74-series logic parts arrives from an independent surplus source, the price is good and the history is thin, and the verification starts with the visual rung, the markings compared against the authentic sample and the marking diagram, the package and the leads inspected for the recycled, remarked, and blacktopped traces, and the first anomalies, a font that is off and a date code that is old, raise the lot's suspicion. The electrical rung runs next, the samples driven in a logic test fixture, the outputs, the levels, the propagation delay, and the temperature behavior compared against the datasheet, and the parts that pass the function and the parameters are cleared, while the parts that drift are pulled for the physical rung. The X-ray settles the suspicious ones, the die and the wire pattern compared against the authentic layout, and the lot's disposition, the cleared volume to the line and the suspect units quarantined, is recorded with the photographs and the test data. The worked example is the ladder run on the risky lot, and it is the model the scaled program formalizes.
The worked example also reads the cost of the verification against the value of the lot, because the legacy lot's risk earns the inspection it received. The visual and the electrical sampling cost a bench afternoon, and the X-ray on the suspicious few costs a laboratory fee, and both are small against the failure that a counterfeit logic part would cause in the field. The buyer who runs the ladder on the risky lot pays the small verification cost and keeps the production safe, and the buyer who skips it saves the fee and gambles the line, which is the economics the verification always faces. The worked example is the concrete face of the risk-scaled verification, and it is the face the workflow's scaling rules turn into the standard procedure, which is the practical completion of the authenticity guide.
The Verification Program: Scaling by Risk and Volume
The verification program is the operating form of the ladder, and it scales the inspection by the risk and the volume so the cost stays proportionate. The risk scaling assigns each part a category by its function, its value, its scarcity, and its source, the commodity parts from the vetted channel get the visual and the sampling, and the safety-critical, the scarce, and the low-confidence-source parts get the full ladder including the X-ray, and the category is the rule the inspectors apply before the bench. The volume scaling sizes the sample by the lot and the risk, the statistically meaningful sample that represents the batch rather than the single unit, and the sample grows with the lot and the suspicion, so the verification's cost follows the quantity and the risk rather than a fixed percentage. The program also trains the inspectors, because the visual rung is only as good as the eye that runs it, and the authentic-sample library and the marking diagrams are the training's reference. The scaling is the difference between a verification that is proportionate and one that is either wasteful or insufficient, and it is the scaling the worked example demonstrated on the legacy lot.
The program also measures its own effect, because a verification program that cannot show its results is a cost without a purpose. The counterfeit rate, the share of the lots that failed and were confirmed, and the escalation rate, the share that reached the X-ray, and the channel quality, the counterfeit rate by source, are the metrics the quarterly review reads, and the metrics direct the improvement, the source that ships the counterfeits is dropped, and the part type that fails is verified harder. The measurement turns the verification from a defensive expense into a managed capability, and it is the measurement the workflow's final step feeds. The program is the completion of the authenticity method, and it is the completion this guide has built from the single lot to the standing capability.
The Industry Standards for Counterfeit Avoidance
The industry standards for counterfeit avoidance are the framework the verification program inherits, and knowing them places the practice in the professional context. The AS6081 and the AS5553 standards from the aerospace and the defense world set the expectation for the counterfeit avoidance, the AS5553 as the management-system standard for the counterfeit-avoidance program and the AS6081 as the distribution-standard for the independent distributors of the fraudulent and the counterfeit-suspect parts, and the SAE and the industry bodies maintain the guidance. The standards codify the discipline this guide has read, the source qualification, the inspection ladder, the documentation, and the reporting, and they require the level of verification to scale with the risk, which is the same scaling the program section described. The commercial buyer does not have to comply with the aerospace standards, but the standards are the benchmark of the practice, and a buyer who runs the verification to the standard's shape is a buyer who has adopted the industry's best practice.
The standards also read the reporting and the documentation that the verification shares, because the counterfeit that one buyer confirms is the market's warning. The standards require the reporting of the confirmed counterfeits to the industry databases, the ERAI and the government agencies, and the documentation of the verification that each lot carries, and the buyer who reports and documents contributes to the market's defense. The standards are the professional frame of the verification, and they are the frame that turns a buyer's own inspection into a part of the industry's shared protection. The standards section completes the authenticity guide's professional context, and it is the context the workflow and the program both assume, which is the practical close of the counterfeit-avoidance discipline.
A Practical Workflow to Verify Authentic Electronic Components
The full verification process fits into a workflow that every buyer and distributor can run in the same order, and the order is what protects against a counterfeit slipping through a single weak step. First, qualify the source before the order, checking its documents, its references, and its ability to show test capability, and record the qualification in the supplier file. Second, inspect the incoming lot, the packaging, the labels, the moisture barrier, and the date codes, before opening the reels, and flag any inconsistency. Third, run the visual inspection on a sample, the markings, the package, the leads, and the body, under magnification, and photograph every finding. Fourth, run the electrical verification on the sample, the functional test, the parametric measurements, and the temperature behavior, against the datasheet and a known good sample. Fifth, escalate the risky lots to physical inspection, X-ray and decapsulation, using the risk and the dispute to decide how far to climb. Sixth, record everything, the photographs, the test data, the X-ray images, the certificates, and the lot traceability, in a single file per lot that survives the audit. A lot that clears the whole workflow is authentic, and the file is the proof, while a lot that fails at any step is quarantined and reported, and the buyer's response is as much a part of the program as the tests.
The workflow is the reason that independent distributors of obsolete, end-of-life, and pin-compatible parts can stand behind their stock, because they run the same ladder as part of their operation rather than as an afterthought. A distributor that tests incoming lots, photographs the inspection, keeps the certificates, and shows the test reports is selling verification along with the part, and that is the product a buyer with a production line actually needs. The same workflow protects the buyer who sources a pin-compatible replacement from an unfamiliar supplier, since a replacement is only as trustworthy as the evidence that it is the part it claims to be, and the verification file transfers with the part into the change record. The discipline is not expensive relative to the failure it prevents, a counterfeit in a production line costs the rework, the downtime, the field failures, and the reputation, and a verification file costs an afternoon and a laboratory. That arithmetic is why the question of how to verify authentic electronic components now has a standard answer, and this workflow is that answer, ready to run on the next lot, from the first label to the last X-ray.
Not sure which sensor fits your project?
Talk to our mmWave application engineers for a free consultation.
Specify your hotel project with our engineers
Send your room count, ceiling type, and protocol preference. We will return a sample plan and quote within 24 business hours.
- Move from general guidance into a product or application discussion.
- Use RFQ when pricing, drawings, MOQ, or launch timing needs structure.
- Keep a direct contact path visible for fast clarifications and handoff.